The Secrets of Creating a Animated Splash Screen In WPF
Greg Roberts
Greg RobertsI come to this post a little relieved, but still frustrated enough that I felt like I needed to share my problem and solution. In short, frustration + google/bing fail + eventual win = blog post.
Setup: I’ve been working on a WPF app, which just so happens to be my first “real” WPF app (I usually do web development), and I wanted to simply embed the version number on our splash image. For those of you not familiar, in WPF having a splash image appear while your app is being loaded is as simple as right clicking on an image and setting it’s build action to “SplashScreen”. At least I believe it’s been that easy since WPF 3.5 SP1 release.
Now you might say, “Greg, this is awesome why would you ever be frustrated with such a simple solution?”. Alas in life, as with programming, nothing is ever simple. Yes this solution works, but most of the time a static image probably won’t fulfill all your requirements, and telling your boss “well that’s not possible” won’t earn you any points. Frankly, it’s also plain lazy too.

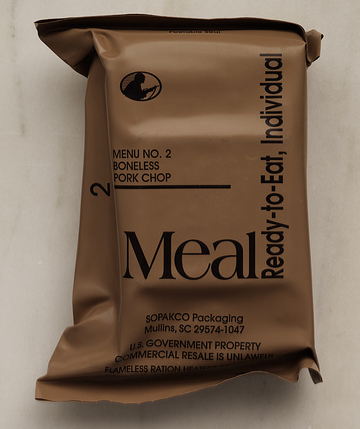
I call these types of features from Microsoft, the MRE’s of development. MREFor those of you not familiar, MRE stands for “Meal Ready-to-Eat” and is used to feed soldiers in the US military in the field. The reason I make the comparison is that any normal person would probably only use the MRE when there was no other suitable food to be had, or when time was a substantial factor.
The same is true with a lot of development features as well. If you just need a quick fix and don’t need a lot of extra fluff then the splash screen feature is great, but now if you want some animations and some dynamic text then the pre-fab solution no longer works.
Here is a list of things that you cannot do with the built-in solution:
- It does not actually improve application cold startup time.
- Cannot display sequence of splash images or animation.
- Does not support for animated GIFs
- Does not have XAML support for setting splash screen image
- Expression Blend does not provide UI to set the SplashScreen build action
Now my solution isn’t going to improve startup time either, it might actually slow it down a bit, but I’m not interested in shaving milliseconds on this, I’m interested in improving the app experience.
Enough talk, here is what you need to do to enable full XAML support in a startup screen without changing too much of your app:
You may have noticed that in .NET 4, there is actually no apparent “Main” method in your code. This is because it is now designer generated for you. So Step 1 is to remove some of this auto-generation by editing the build action of your App.xaml file from “Application Definition” to “Page”.
You need to create a new App entry point, either by creating a separate class or by adding it to your App.xaml.cs file. Add a Main method like the following:
Now you are back in control of your application and you can create your WPF Window that you want to use as your Splash page and make sure the following properties are set in your XAML:
These aren't really all necessary, but this will give you behavior similar to what you got for free.
We need to show this window during startup, and the most important part is to give this window a separate UI thread from your main App. Otherwise, things will get nasty.
This might be a lot to take in, but what I’m doing is creating a new thread and making it’s ApartmentState to be STA (single threaded) and telling the Dispatcher to Run. This threading technique is nothing new, but for more info see here. You need a separate dispatcher for this window compared to your actual app’s window. Now you have two windows running on separate threads.
The last part to the puzzle is communicating to the splash screen and also properly closing it when you are ready. You may have noticed I passed in a reference of the SplashWindow to the App. My app was actually just looking for an interface, but it turns out that my splash window implements that interface. Here is what it looks like:
Now there is nothing special here and this is really up to you how complicated you want to get with communicating, but somehow you need to update status on the splash window and tell it to close. This could be done tons of ways. On the window side you will want to make sure all calls are done on the dispatcher and that you shut yourself down when told.
Finally make sure that you clean up references and be sure to test and see if the thread actually gets dropped after startup.
For extra credit you can combine this with Danial Vaughan's Single Instance App Enforcer if you need to guarantee 1 instance on a machine running at a time.
Hopefully this helps anyone that needs to easily add this functionality, and as always this is just one of many solutions that are out there, but it’s the one that I ended up using.